I'm going to show you, day by day, how I turn this dress into a wedding dress!
I'm getting married on May 30th of this very year (2016! Happy New Year!) and here are the stakes:
So – DAY ONE.
Pattern: Simplicity 1195
Fabrics: Over 3 yds of Satin, same of chiffon, some fine white thread from Dual Duty, and Schmetz embroidery needles 75/11 for my machine from Jo-Ann's.
My height: 5'1" - 5'2"
My weight: approx. 100 lbs
Pattern size: I'm using size 4
Machine: Kenmore 385.12102990
My skill level: Intermediate
I'm getting married on May 30th of this very year (2016! Happy New Year!) and here are the stakes:
- I've spent my parents' money on fabric, needles, thread, buttons, and a rotary cutter to make this dress.
- I have from now until January 16th to complete it, but really only until the 11th (that's one week!) because my fiancé comes here on the 11th and I'd like to spend the time with him rather than hidden away working on my dress. And then I go back to school, and I only have a limited amount of time once the semester starts!
So – DAY ONE.
Pattern: Simplicity 1195
Fabrics: Over 3 yds of Satin, same of chiffon, some fine white thread from Dual Duty, and Schmetz embroidery needles 75/11 for my machine from Jo-Ann's.
My height: 5'1" - 5'2"
My weight: approx. 100 lbs
Pattern size: I'm using size 4
Machine: Kenmore 385.12102990
My skill level: Intermediate
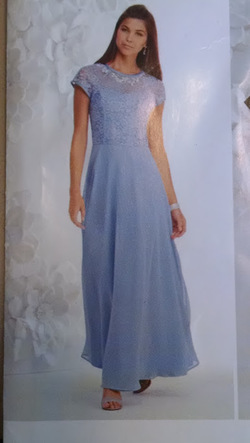
 | I actually bought some materials to make a prototype of sorts. I used a cross between pattern D and the top of pattern A to make this (the two patterns modeled on the packaging):  |
I'd like to add long sleeves (in the chiffon overlay) and, obviously, make sure that the skirt is down to the floor. I also intend to use the same material for the overlay from top to bottom (unlike the change from lace to chiffon in the model image). I didn't include a lining in the bodice. I intend to line the satin with more satin. Hopefully, the lining, if I sew it in properly, will eliminate the visuals of seams throughout the bodice. (I also didn't finish hemming or put buttons on the back of this "proto-dress.")
So for the wedding dress:
Having cut the skirt pieces, I can tell that it will be several inches too long for me – but I don't consider that to be a problem in the least. On the contrary, it should be long.
Problem #1: Just before I began, I looked up tips for sewing with satin. Fortunately I did, for it prompted me to test some stitching on a scrap piece. I could see very clearly that the needle was tugging on the threads in the fabric and creating runs like in nylon stockings. That would not do at all. I fetched some fresh needles from Jo-Ann's (info above).
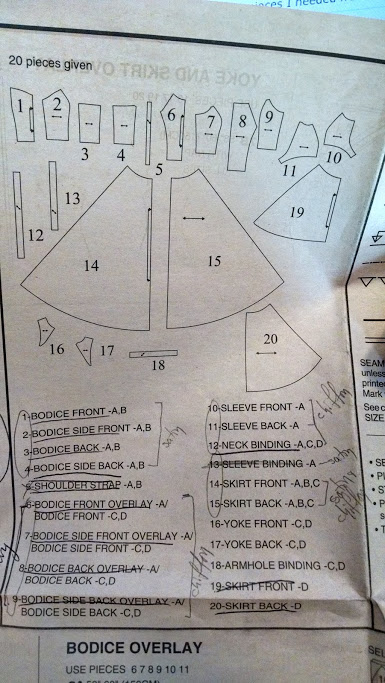 | [Pieces cut from satin: 1-4, 14-15 Pieces cut from chiffon: 6-12, 14-15 Did not use 19 and 20 for this dress] I highly recommend getting a rotary cutter! Especially for slippery fabrics like satin. |
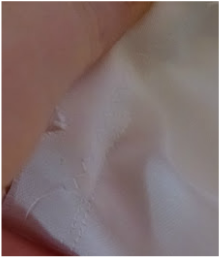
Problem #2: Something got on my satin! I had cut out all the pieces I needed from the satin and had begun following the pattern for the skirt so that it could be finished and hang, waiting for me. Then, as I was working with #15, I noticed some dirty smudges on it! I have no idea where they came from but this was a bump in the road that caused me much anxiety. This morning, I sat down and stared at it for a while.
Then I took the risk. My mother helped me by cleaning out the kitchen sink, filling it up with cold soapy water, and holding excess material. Put only a little detergent in – it doesn't take much. I used these directions to wash the material.
I was surprised how easy it was and how well the material survived. It did not take long to dry, and after letting it lie flat for a while, I delicately draped it over a rack near the wood stove. It was dry in no time and then I removed it so that it wouldn't get smoky.
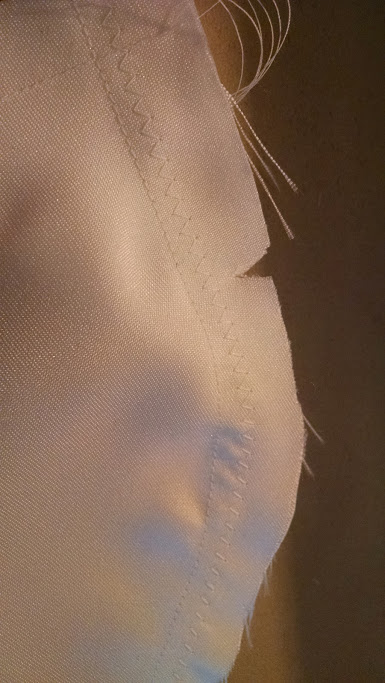 I sewed together a couple of the bodice pieces (#1 and #2) and then I sewed the skirt together and hung it up in the doorway. 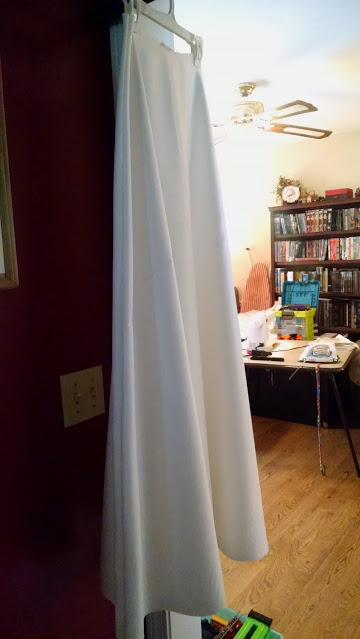 | To keep away fraying problems, I'm meticulously stitching each seam length 2 and then going back and using a zigzag stitch right next to it – doubly sturdy and, I hope, will minimize fraying edges. I'm also being very careful to check right side versus wrong side and double check everything before I sew. I surmise that satin does not much like having stitches ripped out of it. And also, I'm using pins like they are free points in a computer game – excessively. I don't want anything to slip anywhere. 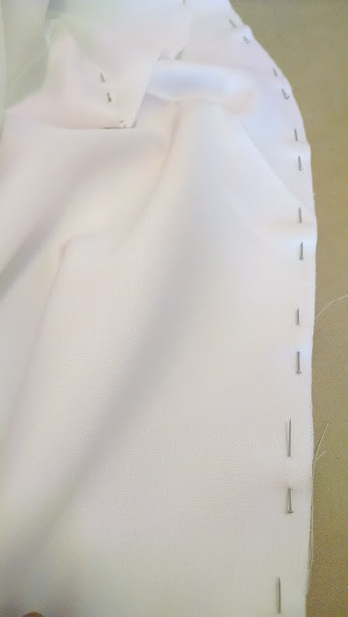 All of the material came with wrinkles and creases, and so although I had read dire warnings about the care with which one must press satin, I went and ironed it. And without much fuss. I ironed the skirt after having sewn it together, but that was no big deal. NOTE: I did iron it on the "wrong side" of the fabric, as the Internet had oft implored, but although there were some reservations about using excessive heat on the fabric, I found that I couldn't use medium-low heat and run over the creases a couple times and be done. I kept the iron on low – around the silk setting – but I had to sit with each section for awhile and run the iron back and forth over it for several minutes. I never left the iron sitting in one place for long periods of time, but one slow swipe made no apparent change to the material, so I had to lovingly and patiently go back and forth, back and forth…. |
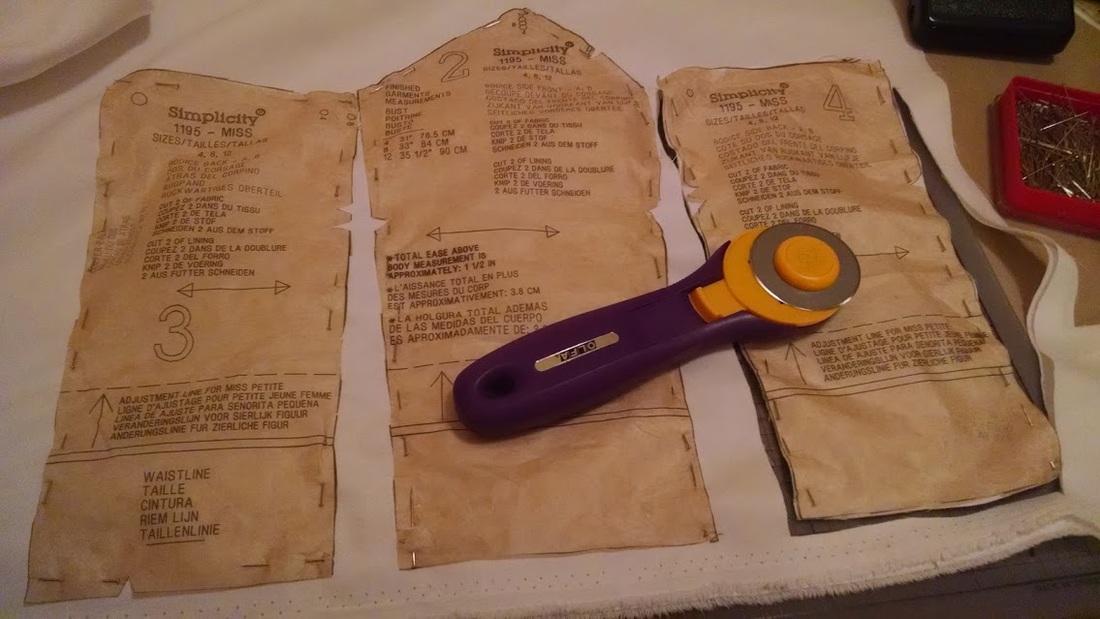
Rotary cutters make cutting much faster.
Then I had to finish the bodice (pieces #1-4). Since I had already done this once before, each step was whizzing by me. It took me something like three days to do all this last time. But by this point, I could see that, if I set my mind on it, I could have the main layer done by the end of the day.
Sewing together the bodice is but two steps in the directions, not including details. I skipped steps 3 and 4 because they involved adding shoulder straps, which I am not interested in for this dress.
Instead, I cut out the exact same bodice pieces a second time. I didn't read what kinds of directions they had for this bit about the lining. I just sewed these individual pieces onto the already existing seams, sewing along the edge in a small zigzag stitch.
And so, being careful of the lining, I folded over the neck edge to the inside. This pattern includes neck binding but I chose not to use it for this. There were several ways I could have handled the neck, and as I looked at it, I was saddened to think that I had to put a seam into the nice smooth satin – but I know no other way to do it and it was getting late into the evening. I didn't want to have to go out and buy something special for a seamless neckline; I wanted this done today.
Sewing together the bodice is but two steps in the directions, not including details. I skipped steps 3 and 4 because they involved adding shoulder straps, which I am not interested in for this dress.
Instead, I cut out the exact same bodice pieces a second time. I didn't read what kinds of directions they had for this bit about the lining. I just sewed these individual pieces onto the already existing seams, sewing along the edge in a small zigzag stitch.
- (If you've ever done this, you'll know that this could have been a disaster if I hadn't been paying attention. You see, the problem with this method is that the lining is not joined at the seam where the main layer is, so if you fold a seam over, the lining could become excess material, since it's not folding where the main layer is folding. So before you press down or sew down the end of a seam, you have to line up (or sort of tuck in) the lining with the corner of the original seam, hold it there, and fold the seam over on it. Otherwise, the lining would have bunched up when you put it on and caused bumps and ripples. Make sense? Unfortunately, this is such a hands-on step in the process that I probably couldn't have gotten pictures even if I'd thought of it.)
And so, being careful of the lining, I folded over the neck edge to the inside. This pattern includes neck binding but I chose not to use it for this. There were several ways I could have handled the neck, and as I looked at it, I was saddened to think that I had to put a seam into the nice smooth satin – but I know no other way to do it and it was getting late into the evening. I didn't want to have to go out and buy something special for a seamless neckline; I wanted this done today.
- (In the end, I don't have much reservation about stitching the neckline in place. I used the smallest zigzag stitch available and it's not especially noticeable. Furthermore, the chiffon layer will go over it, making this tiny detail difficult to notice.)
 | Although I don't have enough material to line the skirt – and it desperately needs to be lined – I turned it right side out and pinned the bodice to it – right side on right side. It was tough. As I knew from the proto-dress, the bodice comes out a little small. It doesn't quite reach all the way around and the seams don't line up perfectly. But it doesn't bother me. I did the best I could and it looks terrific. I sewed the seam with the skirt side facing up so that I could sew below the stay-stitching – a straight stitch, probably length 2. Then I went back, as I am wont to do, and added a width of 2 right next to it. |
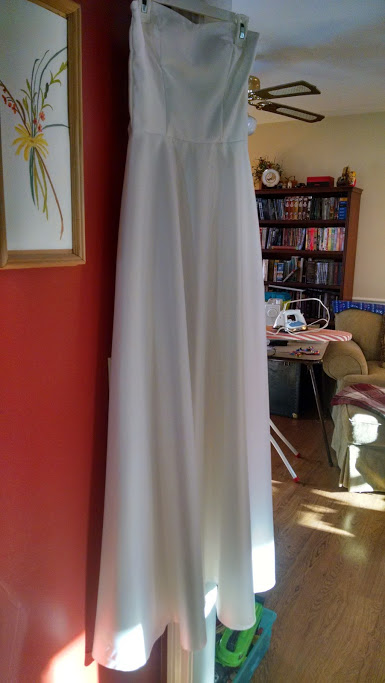 | 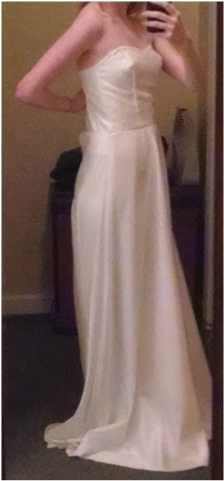 I kept my pants on for this since the skirt is (clearly) very see-through. |

 RSS Feed
